Login to your ThinkDataBackup.com account.
Click on the "Edit account details" ![]() Button beside your email account on your Dashboard.
Button beside your email account on your Dashboard.
You can now change the password you provided for the email account.
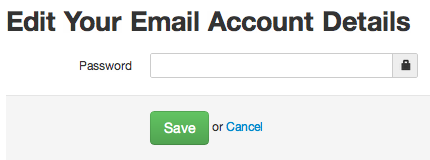
Click on Save once you have entered the new password. Your emails will then be backed up as per schedule.
Login to your ThinkDataBackup.com account.
Click on the ![]() Button beside the email account that would want to delete. You would then be asked to confirm if you want to delete the account.
Button beside the email account that would want to delete. You would then be asked to confirm if you want to delete the account.
Click on Yes. Your account will then be deleted.
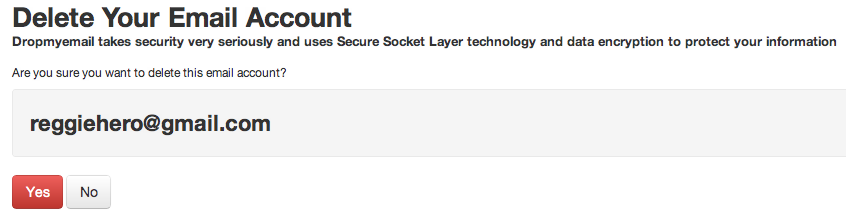
Please note that once you delete an email address, you will not be able to retreive its backup data.
If you have forgot the password, you can reset it from our homepage.
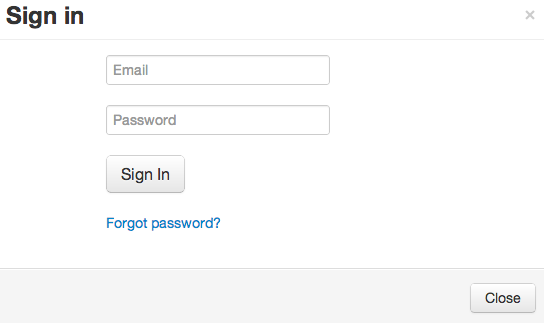
Go to ThinkDataBackup.com and click on “Sign In” Link.
Then click on the “Forgot Password” link.
You will then be asked to enter the email address which you used to sign up for your account. Enter the email address and click on “Send me reset password instructions”
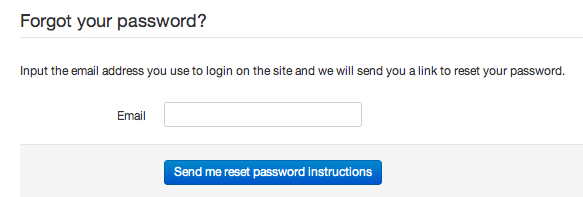
If your email address exists In the system, you will receive an email on that account with instructions to change your password.
If you remember your password and you would want to change it, please follow the instructions given here
No. We current do not provide email hosting. We will soon be releasing our new feature which will allow you to view your emails and send emails from your backed up account using ThinkDataBackup.com.
Even though we do not have a mobile app at present, you can still use your smartphone browser to log-in and visit our online portal of www.ThinkDataBackup.com
We do not add a limit to the number of accounts that you can backup using ThinkDataBackup.com. You are only limited by the amount of space that you need to back up all your accounts. We give you free storage worth 50GB when you sign up for a Trial account. You can then buy storage space as per your usage. You can also upgrade to a higher plan when needed.
For more details to buy storage space, check out our Pricing Page.
Yes. When you add an account for backup, the backup process starts immediately for the first time.
Once a complete backup is taken, your account will be backed up on a daily basis.
You can find out about our pricing plan for the pro account here.
ThinkDataBackup.com uses a secure TLS connection to connect to your mail server to pull the data everytime a backup is scheduled. None of the emails are fetched as plain text. All the email data is encrypted while in transit. This prevents unauthorized access to your emails while they are been fetched by our servers.
We either IMAP or POP3 to pull data from the SMTP servers. We have pre-set APIs which we use to pull data from most of the popular email providers such as Gmail, Yahoo, Hotmail, Sina and QQ.
Login to your ThinkDataBackup.com account.
Click on the "Edit account details" ![]() button beside your email account on your Dashboard.
button beside your email account on your Dashboard.
On Edit Your Email Account Details page, click on ![]() button and input your email configuration.
button and input your email configuration.
Click on Save once you have entered the new configurations. Your email will then be backed up as per schedule.
Login to your ThinkDataBackup.com account.
Click on "Account Settings" on the Menu Bar and select "Profile and Preferences".
Scroll down to "Close Account" section as shown. 
Please click on ![]() Close My Account button.
Close My Account button.
Please note that you will not be able to retreive your account and backup data after closing your account.
No, we are sorry but it is impossible to do that due to the security reasons. Please copy and paste it into your brower manually.
No. We currently do not support this feature. We are working on this and we will be rolling out this feature soon.
Yes. You can view the emails that have been backed up. You can also download the attachments to your computer and view them.
You can also search through and browse your attachments via our Attachment Manager.
Yes, if your email account is supported by IMAP protocol we can back up sub-folders except spam email folder.
For an email account of POP protocol, emails in INBOX can be backed up, not all sub-folders.
If you want to backup your emails, you can follow the instructions given here.
There will not be an email sent to your provider nor will there be any warning messages thrown by ThinkDataBackup.com.
If your email provider has a very strict security policy and they are monitoring your IMAP/POP traffic, then he would know that ThinkDataBackup.com is accessing your emails.
Yes. You can view your backed up emails via ThinkDataBackup.com.
Login to your profile from http://www.ThinkDataBackup.com
You will then be redirected to your Dashboard.
Click on the ![]() Button beside the email account which you would like to view.
Button beside the email account which you would like to view.
You can then view all the emails, read the messages and download the attachements which have been backed up.
At the moment, we backup once a day for the all accounts except the accounts that connects to the server in Singapore region.
We back up the accounts in Singapore every two hours.
We suggest that you wait for 24 hours after the initial backup. When you add an email account for the first time, the backup process starts immediately.
The time to complete the initial backup depends on one of the following reasons:
- Number of emails added
- Size of the mailbox: The more the size of the mailbox the longer it takes for the initial backup to be completed
- Number and size of attachments: Since ThinkDataBackup.com lets you navigate your attachments and files separately using the file manager, the more the number of attachments in the email, the longer it takes for the initial backup to be completed
- Bandwidth restriction on the mail server side
- Issues and downtimes on the side of your mail server
We request you to kindly be patient for the initial backup. For any issues click here to contact us.
No. Currently we do not provide this feature. The emails are backed up once a day.
We will be implementing this feature in the future.
Our backup policy is fairly straight forward. The first backup takes all the email. Subsequent backups only take what is newer than the last backup. There is never a reconcile to try and delete mail that a user has deleted from their gmail account. This ensures that if email is accidentally or maliciously deleted from their actual email account they still will have a backup to restore from.
Unfortunately, in the nature of the data backup, the functionality of deleting unwanted backup emails is not provided.
Go to Pricing & Plans
Click on "Start Free Trial"
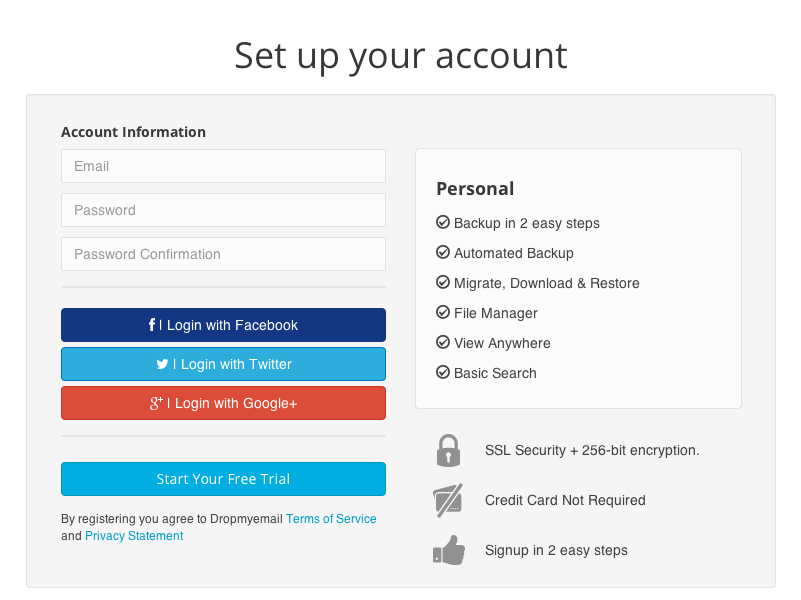
- Enter your details in the signup box. You need an email address, a password and re-confirm your password.
- Press the “Start Free Trial” button and your account will be created.
- You can also use your Facebook, Twitter or Google ID to open an account.
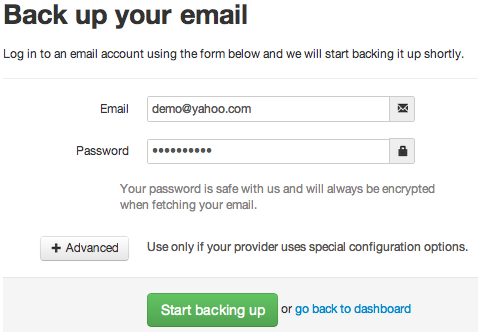
After you sign up for an account, just enter your email address and the password of the email account. Then click on “Start Backing up”.
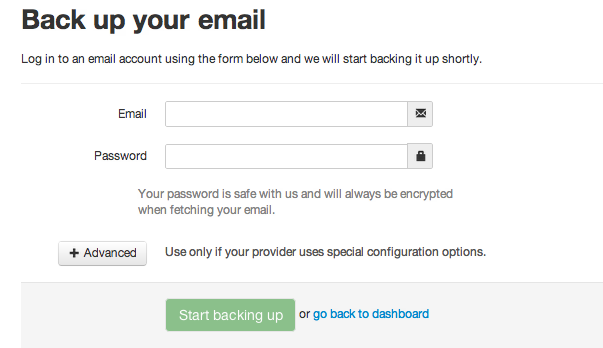
If you are using your own email exchange server, then click on Advanced and enter the correct email settings and then click on “Start Backing Up”.
You will then be directed to the dashboard where your account will be listed. You can add more accounts by clicking on the “Add Email Account” button on the dashboard and follow the instructions above.
- Go to http://www.ThinkDataBackup.com.
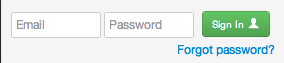
- If you have signed up using an email address and password, just enter your email id and password on the top right hand side of the page.
- Click on the “Sign In” button and you would be logged in and redirected to the Dashboard.
- If you have signed up using Facebook, Twitter or Google, just click on the specific button and you would be logged in.

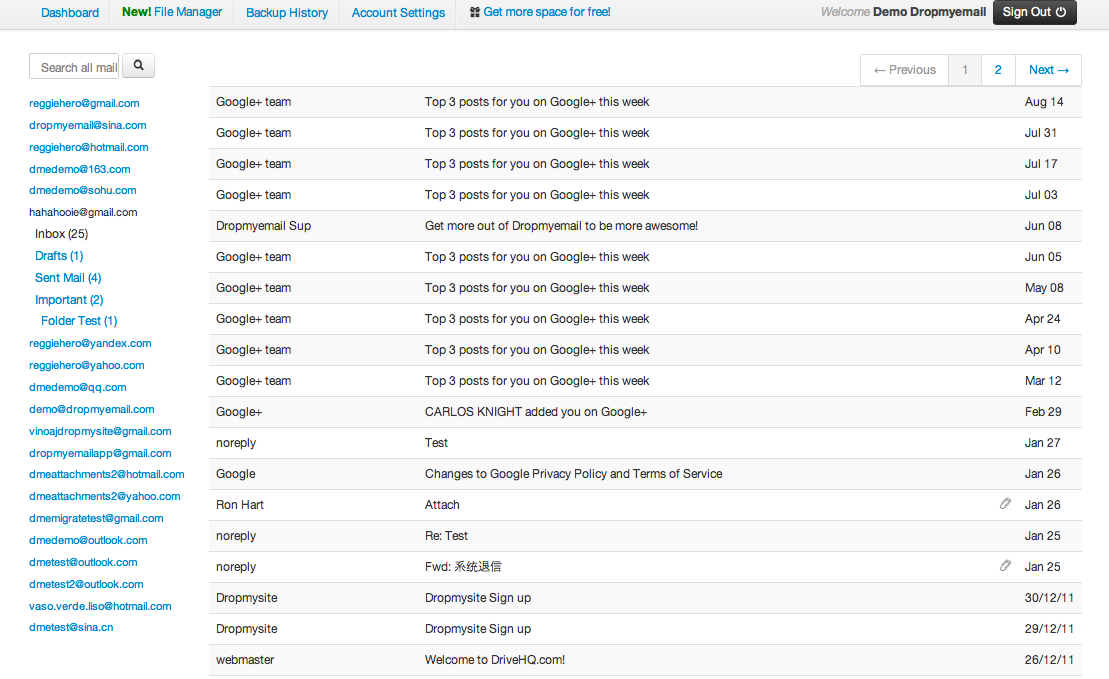
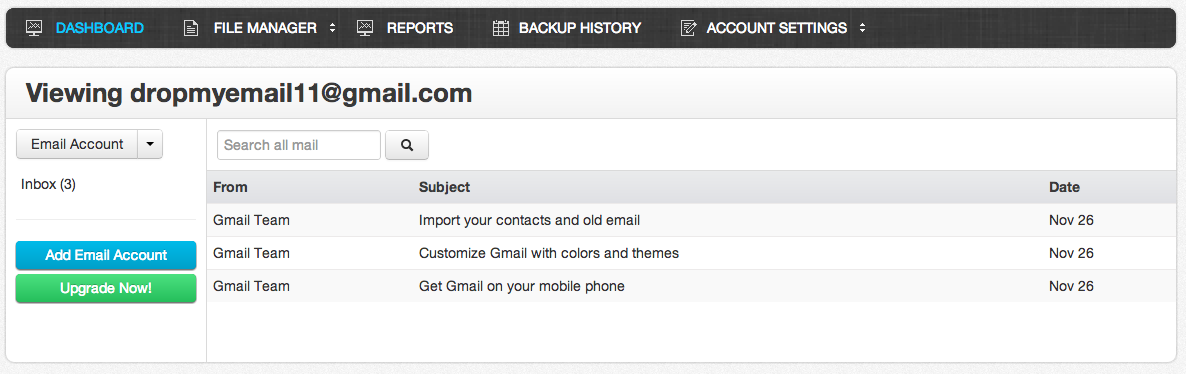
One you have signed in to your account, you can view your email accounts on the dashboard.
Click on the ![]() Button to view your email backup.
Button to view your email backup.
You can then view and search the emails that have been backed up.
Please note that the backup starts immediately after you add an account but would take some time before the backup process completes and you can then view your backup emails.
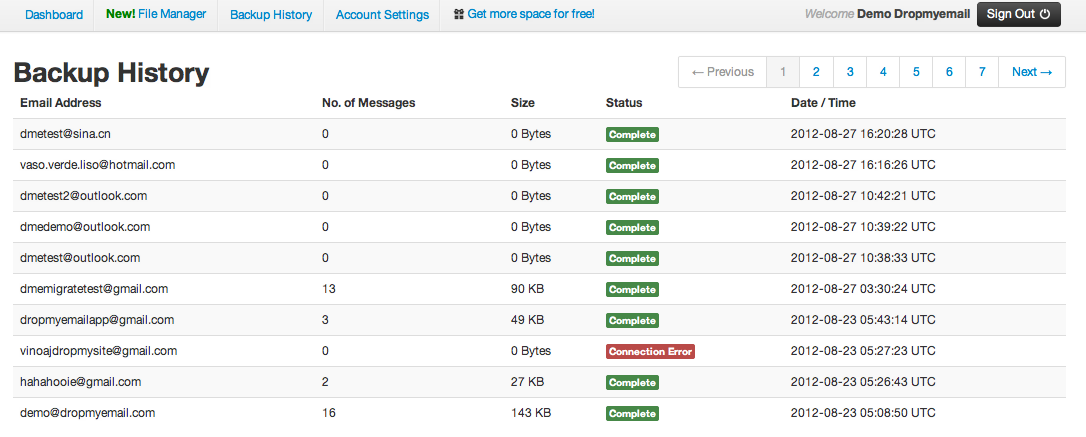
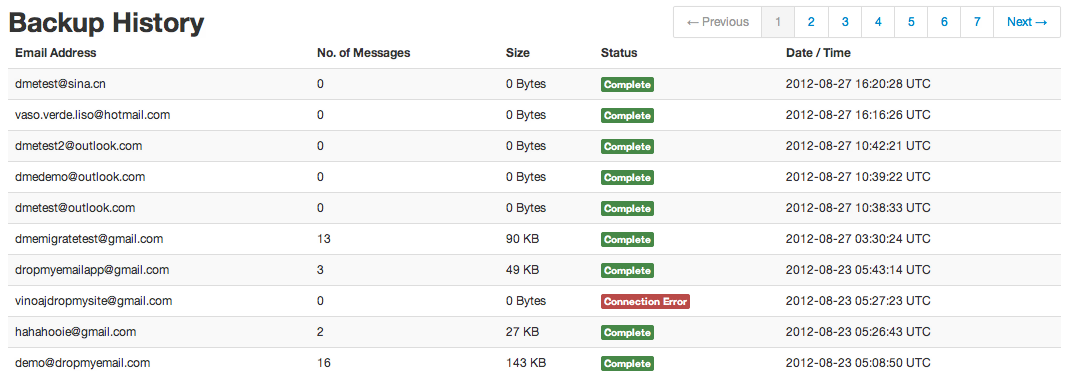
After you have signed in, Click on “Backup History” link on the Menu Bar. You can then view the number of messages, size of the backup, the current status and the date and time when the account was last backup.
If you have a Facebook account, you can use that to sign up for ThinkDataBackup.com.
Go to http://www.ThinkDataBackup.com and click on the “Facebook” button. If you have not logged on to Facebook, you will be prompted to login.
You would be asked to authorize the account for the ThinkDataBackup.com app. Click on “Go to App”.
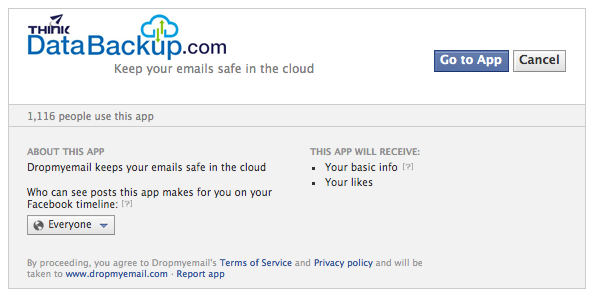
Your account will then be created and you will be redirected to the Dashboard of your account. Now you can start adding email accounts to backup.
If you have a Google account, you can use that to sign up for ThinkDataBackup.com.
Go to http://www.ThinkDataBackup.com and click on the “Google” button. If you have not logged on to Google, you will be prompted to login.
You will then be asked to Authorize ThinkDataBackup.com to access your google account information. Click on “Allow”.

Your account will then be created and you will be redirected to the Dashboard of your account. Now you can start adding email accounts to backup.
If you have a Twitter account, you can use that to sign up for ThinkDataBackup.com .
Go to http://www.ThinkDataBackup.com and click on the “Twitter” button. If you have not logged on to Twitter, you will be prompted to login.
You would then be asked to authorize the “ThinkDataBackup.com development” app to your Twitter account. Click on “Sign In”.
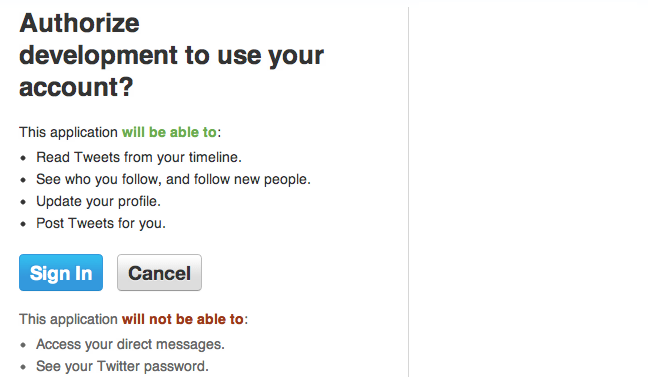
Your account will then be created and you will be redirected to the Dashboard of your account. Now you can start adding email accounts to backup.
Our Trial account enables you to try out all but one features of a paid account. For full paid account you will be able to use the migrate feature. This will let you migrate all your email server to server to another email address.
Login to your ThinkDataBackup.com account by visiting http://www.ThinkDataBackup.com
From the dashboard, click on ![]() .
.
Enter your Gmail email address in the form <username>@gmail.com.
You will then see a "Sign in with Google" message. We use the OAuth access to login to your Gmail to back up the data.
Click on "Sign in with Google".
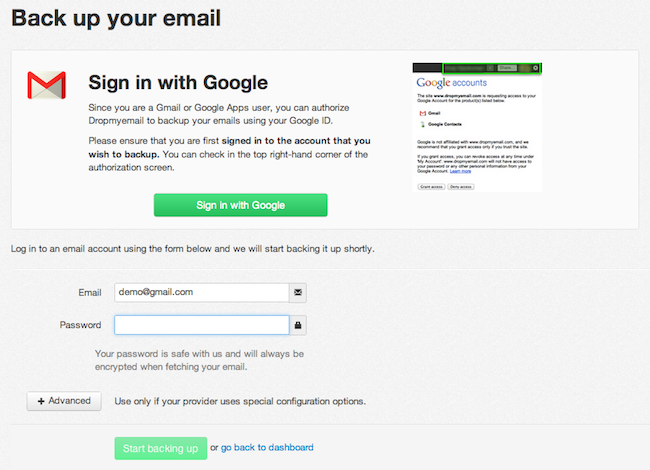
You will then be asked to connect the Gmail account with ThinkDataBackup.com . Click on "Grant Access".
Your Gmail account will now be scheduled for backup.
Login to your ThinkDataBackup.com account by visiting http://www.ThinkDataBackup.com
From the dashboard, click on ![]() .
.
Enter your Hotmail email address in the form <username>@hotmail.com
Enter your password and click on “Start Back Up”.

Your Hotmail account will now be scheduled for backup.
Login to your ThinkDataBackup.com account by visiting http://www.ThinkDataBackup.com
From the dashboard, click on ![]()
Enter your Yahoo email address in the form <username>@yahoo.com
Enter your password and click on “Start Back Up”.
Your Yahoo account will now be scheduled for backup.
Login to your ThinkDataBackup.com account by visiting http://www.ThinkDataBackup.com
From the dashboard, click on ![]()
Enter your Aol email address in the form <username>@aol.com
Enter your password and click on “Start Back Up”.

Your Aol account will now be scheduled for backup.
Login to your ThinkDataBackup.com account by visiting http://www.ThinkDataBackup.com
From the dashboard, click on ![]() .
.
Enter your email address in the form <username>@<domain>.com
Click on the ![]() button.
button.
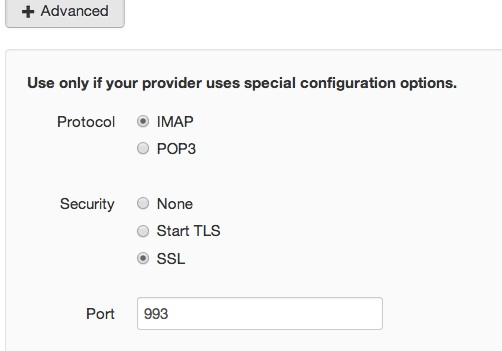
Select the Protocol which you want to use to pull in the email.
Then select the security settings for your email server and enter the Port number.
Enter the host name of your email server. For example imap.example.com, pop.example.com
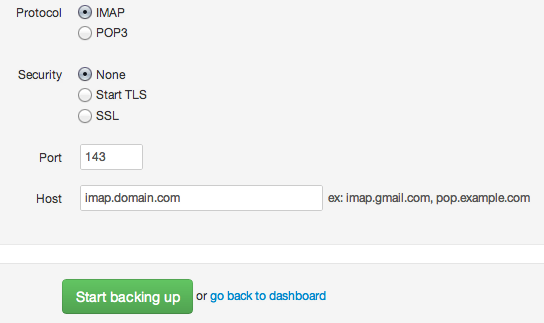
Then Click on “Start Backing Up”
If all the settings are correct, your email accout will be added and be scheduled for backup. If you still have issues backing up your data, you can contact us at support@ThinkDataBackup.com
In order to back up an email account with 2-step-verification enabled, you will need to generate an app password for your email account.
Instead of your correct email password, please input that app password as your email's password on ThinkDataBackup.com dashboard.
We can back up your emails without disabling 2-step-verification.
How to generate App Password
Google:https://support.google.com/accounts/answer/185833?hl=en
Hotmail:http://windows.microsoft.com/en-us/windows/app-passwords-two-step-verification
Yahoo:https://help.yahoo.com/kb/yahoo-account/generate-separate-quotapp-passwordquot-sln15241.html
You can search through your attachments using keywords that are present in the name of the attachment.
Go to the attachments page.
Click on the search box and type in the keyword.
![]()
For example, if you want to search for a file named franceholiday.jpg, you can search for keywords like “france” “franceholiday” or “franceholiday.jpg”
You can also search for a file by its extension such as “.jpg” and “.pdf” .
You can either view your attachments from the Email View or the Attachment view page. ThinkDataBackup.com lists all your email attachments under a single folder and makes it easier for you to browse through them.
Email View :
Click on “View” beside the email account where the attachment resides.
Browse through the emails or search for the email containing the attachment.
Scroll down the email and you can find the attachment at the bottom.
Click on it and it will be downloaded to your computer to the default download location of your browser.
Attachment View :
Go to the Attachments page.
Search for the attachment using the search bar or browse through the list of attachments.
You can either download the attachment or share it with your friends using Email, Facebook, Twitter, LinkedIn or via a share link.
ThinkDataBackup.com provides you multiple ways to share the attachment with your friends. You can either share it using Facebook, Twitter, LinkedIn, email or by sending them a sharing link.
Share Link ![]()
Hover your mouse over the attachment that you would like to share. You will see the Share Link.
Click on the Share Link.
A new window will open with a preview of the attachment.
You can copy the url of the link from the address bar and send it to your friend.
Your friend can either view the attachment or download it by clicking on the ![]() button.
button.
Facebook ![]()
Hover your mouse over the attachment that you would like to share. You will see the Facebook Button.
Click on the Facebook Button.
A new pop up window will show up with the link to your file.
You can add your custom message to the link.
Click on “Share” and the link to the file will be posted on your Facebook wall.
Your friends can now click on the link to view the attachment.
Twitter ![]()
Hover your mouse over the attachment that you would like to share. You will see the Twitter Button.
Click on the Twitter Button.
A new pop up window will show up with the link to your file.
You can add your custom message to the link.
Click on “Tweet” and the link to the file will be posted on your Twitter feed.
Your friends can now click on the link to view the attachment.
LinkedIn ![]()
Hover your mouse over the attachment that you would like to share. You will see the LinkedIn Button.
Click on the LinkedIn Button.
A new pop up window will show up with the link to your file.
You can add your custom message to the link.
Click on “Share” and the link to the file will be posted on your LinkedIn wall.
Your friends can now click on the link to view the attachment.
Email ![]()
Hover your mouse over the attachment that you would like to share. You will see the Email Button.
Click on the Email Button.
A new pop up window will show up where you can enter the email address/es of the friends with whom you want to share the attachment with. You can add your custom message to the link.
Click on “Send” and the link to the file will be emailed
Your friends can now click on the link to view the attachment.
Once you share the attachment, only people with the link can view the attachment. Every attachment has a unique link. If you want to, you can Unshare the attachment anytime by clicking on the ![]() icon beside the file.
icon beside the file.
No. When you share an attachment with someone, the person can only view that particular attachment. He/she will not have access to any of your emails or other attachments. We have taken multiple security measures to ensure that only the attachments you choose to share are viewable by those you share with.
Just like your emails, your attachments are safe. No one has access to your attachments unless you have explicitly shared it with someone.
When you share an attachment with someone, only that person with the link has access to that attachment. The person can only view the attachments shared with him and will not be able to access the rest of the attachments.
Yes. We allow you to share an attachment with anyone who has the link. Hover your mouse over the attachment that you would like to share. You will see the Share Link.
Click on the ![]() Link.
Link.
A new window will open with a preview of the attachment.
You can copy the url of the link from the address bar and send it to your friend.
Your friend can either view the attachment or download it by clicking on the ![]() button.
button.
We have created a separate folder that lists the shared attachments.
Go to the Attachments page by clicking on the Attachment Manager button on the Dashboard beside the email account that you want to view.
Click on the “My Shared” folder on the left column of the screen.
You will see the list of all the attachments that you have shared.
You can also go to the main Attachments folder. If an attachment is shared, it will have an ![]() icon beside it.
icon beside it.
No. We do not limit the number of attachments that you can share. We do not restrict the number of people with which you can share the attachment. You can share as many attachments that you have with any number of people.
No. We do not restrict the size of the attachment. Your email provider restricts the size of your attachment. ThinkDataBackup.com supports attachments of all sizes and types.
We do not allow users to delete attachments, Emails are meant to be immutable, and to retain the sanctity of your backups, we do not allow for backed up emails to be altered in any way. This includes modifying the messages and/or attachments. You can share the attachments with your friends but you cannot modify it.
Login to your ThinkDataBackup.com account and go to your Dashboard.
Click on the “Migrate” button beside the email account that you want to migrate.
Enter the email address and password of the new account to which you want to migrate the emails.
If you are using a personal email server, then you can refer to the Advanced Settings page for more details.
Your email will then be scheduled for migration.
Yes. You can migrate an email backup to an existing account. The emails will be added to the new account preserving the folder structure.
You can follow the instructions here to migrate your email.
Yes. You can migrate multiple email backups to a single email account. All the emails will be migrated to the new account by preserving your folder structure.
You can follow the instructions given here to migrate each email backup to the email account.
Yes. The original date and time of the emails will be preserved in the target email account.
Login to your ThinkDataBackup.com account by going to http://www.ThinkDataBackup.com
You will be redirected to your Dashboard.
Click on the “Restore” button beside the email account that you would like to restore.
You would be asked to reconfirm your action. Click Yes.
Your emails will now be restored to the email account.
The emails will be restored into the original folders if the protocol of your email account is IMAP.
For an email account with POP protocol, the emails will only be restored in INBOX.
As for migration, when the protocol of the original and destination email addresses is IMAP, the migrated emails will be sorted out into sub-folders.
Please note that all of the emails will be migrated into IBOX when running the migration from IMAP email address to POP email address.
If you want to restore your emails, you can follow the instructions given here.
No. We currently do not provide this feature. We are working towards implementing more features in the coming months.
Once you have backed up your Gmail account, you can migrate all the emails to Fast Mail. Just click on the migrate button and enter your email address and password for yoru fastmail account. Then click on the Advanced button and use the following settings :
Hostname : mail.messagingengine.com
Port : 993
Protocol : IMAP
SSL : True
Then click on Migrate and your emails will then be migrated.
The most common errors we see are connection and authentication errors.
Our servers have to establish a connection to the mail servers to retrieve the emails. There are a few factors which can disrupt it:
- The mail server is under heavy load and does not respond to our connection requests.
- The packets get dropped or blocked(for e.g. throttling of traffic)
- The server could be down.
- The configuration for the server changed.
- The SSL cert for the server expired or is self signed(which causes authentication to fail)
- Your password has changed or is incorrect. That causes authentication errors.
Our servers will attempt to reconnect. But as you can see many of the factors are beyond our control, you can try to address the factors by trying again later, check the server configuration and/or SSL cert and confirm your password entered.
Your files are stored securely on our servers. We use military grade encryption to ensure your data is well protected and stored on our server.
We pay special attention to security for our application and our servers. We have an experienced team which uses the best engineering practice and tools to develop the product.
Your emails can only be accessed by your account. ThinkDataBackup.com employees are prohibited from viewing your account and email backups. We follow the same methods like most online services where we have a small team of employees who must be able to access user data for the reasons stated in our privacy policy (e.g., when legally required to do so). We have a strict policy and access controls for these employees that prohibit them to access the data except for these rare situations.
We use AES 256 bit encryption and Secure Sockets Layer (SSL). Our files are stored on Amazon’s Simple Storage Service (S3). Amazon S3 itself has its own robust security policy of its own, details of which can be found here.
ThinkDataBackup.com uses Amazon’s Simple Storage Service (S3) to store all your emails. Amazon S3 is a secure data storage solution provided by Amazon AWS. It uses all the latest security methods to ensure that the files are stored securely. You can find more about the security implementation of S3 here.
All the files are encrypted and stored on the servers. We follow strict regulation and access control policies to access the S3 storage. Your files are secure and are only visible to you via your ThinkDataBackup.com account.

We ensure that your emails are stored securely on our servers. Your email backup can only be access by you via your ThinkDataBackup.com account. No other user with a ThinkDataBackup.com account has access to your files. We have proper security policies in place to ensure that your files are protected from unauthorized access.
ThinkDataBackup.com uses AES-256 bit encryption to encrypt your emails. We use Secure Socket Layer (SSL) to pull information from your current email provider to our servers.
Your emails are stored on Amazon’s Simple Secure Storage (S3) solution which has a robust security policy, details of which can be found here.
Login to your ThinkDataBackup.com account.
Click on "Account Settings" on the Menu Bar.
Scroll down to the Password Secton as shown below.

Type in your current password under “Current Password”. Then type in your new password and confirm it. Click on Save and your password will be changed. You can now use your new password to login to your account.
When you sign up for the trial account, you are provided 50GB of storage space. After your trial period is over, you can purchase a full plan based on your storage requirement. We have plans for 5GB, 10GB, 25GB, 50GB, 75GB and 150GB.
If you are not sure which plan to purchase, please refer to your current storage usage on Dashboard after signing ThinkDataBackup.com via https://www.ThinkDataBackup.com.
To upgrade to a full account, please click on the”Upgrade Now” button on the dashboard.
Click on the Choose Plan button beside a full plan which you would want to sign up for.
You will then be directed to the payment page. You can use PayPal or your credit card to make the payment and your account will be upgraded immediately.
You can make a payment using your Credit Card or Debit Card for ThinkDataBackup.com Pro Account. We also provide you the option to use PayPal as a mode of payment for your account. We current support two payment gateways namely PayPal and WorldPay.
We use a secure payment gateway and we do not store your credit card details while accepting your payment. Please read our Privacy Policy for more details on the data that we collect.
Our Trial account enables you to try out all the available features of a paid account beside migration feature. Your trial account is valid for a period of 15 days. You will be reminded to choose a full account with in the trial period.
If you do not have a credit card, you can use your Debit Card to make the payment. We support two payment gateways to process your payments. You can either use PayPal or WorldPay to make the payment.
You can look at the list of countries from which PayPal accepts payment by visiting the link here. For the rest of the countries, you can use WorldPay.
If you have any questions about on how to use ThinkDataBackup.com, you can search for it in our FAQ section. If you do not find a solution, you can get support here
Login to your ThinkDataBackup.com account.
Click on the ![]() Button beside your email account on your Dashboard.
Button beside your email account on your Dashboard.
You can now change the password you provided for the email account.
Click on Save once you have entered the new password. Your emails will then be backed up as per schedule.
Login to your ThinkDataBackup.com account.
Click on the ![]() Button beside the email address that would want to delete. You would then be asked to confirm if you want to delete the address.
Button beside the email address that would want to delete. You would then be asked to confirm if you want to delete the address.
Click on Yes. Your email address will then be deleted.
Please note that once you delete an email address, you will not be able to retreive its backup data.
If you have forgot the password, you can reset it from our homepage.
Go to ThinkDataBackup.com and click on “Sign In” Link.
Then click on the “Forgot Password” link.
You will then be asked to enter the email address which you used to sign up for your account. Enter the email address and click on “Send me reset password instructions”
If your email address exists In the system, you will receive an email on that account with instructions to change your password.
If you remember your password and you would want to change it, please follow the instructions given here
No. We current do not provide email hosting. We will soon be releasing our new feature which will allow you to view your emails and send emails from your backed up account using ThinkDataBackup.com.
Even though we do not have a mobile app at present, you can still use your smartphone browser to log-in and visit our online portal of www.ThinkDataBackup.com
We do not add a limit to the number of accounts that you can backup using ThinkDataBackup.com. The number of accounts that you can backup depends on the number of seats you have purchased based on the plan.
We give you 100 seats when you sign up for a Trial account. You can then buy the number of seats as per your usage. You can also upgrade to a higher plan when needed.
For more details to buy storage space, check out our Pricing Page.
Yes. When you add an account for backup, the backup process starts immediately for the first time.
Once a complete backup is taken, your account will be backed up on a daily basis.
You can find out about our pricing plan for the pro account here.
ThinkDataBackup.com uses a secure TLS connection to connect to your mail server to pull the data everytime a backup is scheduled. None of the emails are fetched as plain text. All the email data is encrypted while in transit. This prevents unauthorized access to your emails while they are been fetched by our servers.
We either IMAP or POP3 to pull data from the SMTP servers. We have pre-set APIs which we use to pull data from most of the popular email providers such as Gmail, Yahoo, Hotmail, Sina and QQ.
Yes. We now allow users to download their emails in .eml format. The emil format is a widely known email format and the emails can be opened using any of the well known email clients such as Thinderbird, Apple Mail, Sparrow etc.
To download your email, Login to your ThinkDataBackup.com account and go to your Dashboard.
Click on the ![]() button beside the email account that you want to download.
button beside the email account that you want to download.
Choose the mailbox that you would like to download and click on ![]()
This process might take some time depending on the number of emails in your mailbox. You can come back to the page by clicking on the download button beside the email account.
Once the download is prepred, you would see a download link on the Download page. Click on the link and the emails would then be downloaded as a zip file. You can now unzip the file and view all the emails in an eml format.
Login to your ThinkDataBackup.com account.
Click on "Account Settings" on the Menu Bar and select "Profile and Preferences".
Scroll down to "Close Account" section as shown. 
Please click on ![]() Close My Account button.
Close My Account button.
Please note that you will not be able to retreive your account and backup data after closing your account.
No. We currently do not support this feature. We are working on this and we will be rolling out this feature soon.
Yes. You can view the emails that have been backed up. You can also download the attachments to your computer and view them.
You can also search through and browse your attachments via our Attachment Manager.
Yes. You can view your backed up emails via ThinkDataBackup.com.
You will then be redirected to your Dashboard.
Click on the ![]() Button beside the email account you want to view the emails for.
Button beside the email account you want to view the emails for.
You can then view and search the emails that have been backed up for that account.
You can then view all the emails, read the messages and download the attachements which have been backed up.
Unfortunately, in the nature of the data backup, the functionality of deleting unwanted backup emails is not provided.
There will not be an email sent to your provider nor will there be any warning messages thrown by ThinkDataBackup.com.
If your email provider has a very strict security policy and they are monitoring your IMAP/POP traffic, then he would know that ThinkDataBackup.com is accessing your emails.
Our backup policy is fairly straight forward. The first backup takes all the email. Subsequent backups only take what is newer than the last backup. There is never a reconcile to try and delete mail that a user has deleted from their gmail account. This ensures that if email is accidentally or maliciously deleted from their actual email account they still will have a backup to restore from.
The backup starts immediately as soon as you add your email account. The time to backup your inbox depends on the number of emails in your account.
We take a daily backup every 24 hours for non-Singapore regions and every 2 hours for Singapore region.
You can view the progress of your email backup on the dashboard under the "No. of Messages" coloumn of the email account.
No. Currently we do not provide this feature. The emails are backed up once a day.
We will be implementing this feature in the future.
Yes, if your email account is supported by IMAP protocol we can back up sub-folders except spam email folder.
For an email account of POP protocol, emails in INBOX can be backed up, not all sub-folders.
If you want to backup your emails, you can follow the instructions given here.
Go to https://www.ThinkDataBackup.com/pricing.php

- Select the plans that you would like to trial out, enter the mailboxes that you would like and click on "Start Free Trial"
- Enter your details in the signup box. You need an email address, a password and re-confirm your password and your company name.
- Press the “Start Free Trial” button and your account will be created.
You will then be directed to the dashboard of your account for setup of backing up.
After you sign up for an account, just enter your email address and the password of the email account. Then click on ![]() .
.
If you are using your own email exchange server, then click on Advanced and enter the correct email settings and then click on ![]() .
.
You will then be directed to the dashboard where your account will be listed. You can add more accounts by clicking on the ![]() button on the dashboard and follow the instructions above.
button on the dashboard and follow the instructions above.
You can also send a request to your collegues to aunthenticate their email account for back by clicking on ![]()
- Go to https://www.ThinkDataBackup.com/.
- Click on the Sign In link on the top right hand of the page.
- Just enter your email id and password in the pop up window.
- Click on the “Sign In” button and you would be logged in and redirected to the Dashboard.
One you have added an account for backup, you can view your email accounts on the dashboard.
Click on the ![]() Button beside the email account you want to view the emails for.
Button beside the email account you want to view the emails for.
You can then view and search the emails that have been backed up for that account.
Please note that the backup starts immediately after you add an account but would take some time before the backup process completes and you can then view your backup emails.
After you have signed in, Click on ![]() link on the Menu Bar. You can then view the number of messages, size of the backup, the current status and the date and time when the account was last backup for each of the email accounts you have added.
link on the Menu Bar. You can then view the number of messages, size of the backup, the current status and the date and time when the account was last backup for each of the email accounts you have added.
ThinkDataBackup.com provides you a method to send an email to your coworker to authenticate their account for backup. This ensures that the security practises of your company is not compromised.
In order to add a coworker's email, go to the dashboard of your account.
Click on the ![]() button.
button.
You will be asked to enter your coworker's email address.
Enter the email address and click on ![]() button.
button.
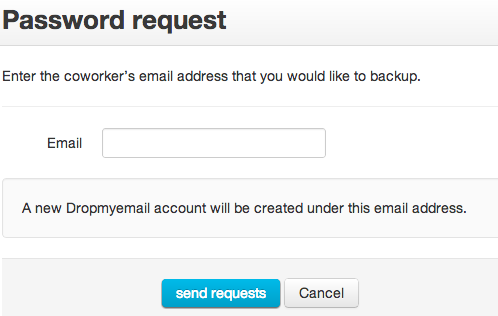
An email will be send to your coworker with a link to enter his email credentials to allow backup of the email under your account.
Sign in to your free ThinkDataBackup.comtrial account. On successful signup go to update now link. Alternatively please click on the email that we had sent you for update.
Our Trial account enables you to try out all but one features of a paid account. For full paid account you will be able to use the migrate feature. This will let you migrate all your email server to server to another email address.
Login to your ThinkDataBackup.com account by visiting https://www.ThinkDataBackup.com/
From the dashboard, click on ![]() .
.
Enter your email address in the form <username>@domain.com.
If the account is hosted via Google Apps, ThinkDataBackup.com will automatically detect it and ask you to sing in using Google OAuth.
You will then see a "Sign in with Google" message. We use the OAuth access to login to your Gmail to back up the data.
Click on "Sign in with Google".
You will then be asked to connect the Google Apps email account with ThinkDataBackup.com. Click on "Grant Access".
Your Gmail account will now be scheduled for backup.
Login to your ThinkDataBackup.com account by visiting https://www.ThinkDataBackup.com/
From the dashboard, click on ![]() .
.
Enter your email address in the form <username>@<domain>.com and your password.
Click on the ![]() button.
button.
You can either select the IMAP or POP3 settings. Hostgator supports both the protocols.
Then select the securityas None.
If you selected POP3, then enter the port number as 110. If you have selected IMAP as your protocol, then enter 143 as the port number.
Enter the host name as mail.yourdomain.com.
Then Click on “Start Backing Up”
If all the settings are correct, your email accout will be added and be scheduled for backup. If you still have issues backing up your data, you can contact us at support@ThinkDataBackup.com
Login to your ThinkDataBackup.com account by visiting http://www.ThinkDataBackup.com
From the dashboard, click on ![]()
Enter your Yahoo email address in the form <username>@yahoo.com
Enter your password and click on “Start Back Up”.
Your Yahoo account will now be scheduled for backup.
Login to your ThinkDataBackup.com account by visiting https://www.ThinkDataBackup.com/
From the dashboard, click on ![]() .
.
Enter your email address in the form <username>@<domain>.com
Click on the ![]() button.
button.
Select the Protocol which you want to use to pull in the email.
Then select the security settings for your email server and enter the Port number.
Enter the host name of your email server. For example imap.example.com, pop.example.com
Then Click on “Start Backing Up”
If all the settings are correct, your email accout will be added and be scheduled for backup. If you still have issues backing up your data, you can contact us at support@ThinkDataBackup.com
Login to your ThinkDataBackup.com account by visiting https://www.ThinkDataBackup.com/
From the dashboard, click on ![]() .
.
Enter your email address in the form <username>@<domain>.com and your password.
Click on the ![]() button.
button.
You can either select the IMAP or POP3 settings. GoDaddy supports both the protocols.
Then select the security as None.
If you selected POP3, then enter the port number as 110. If you have selected IMAP as your protocol, then enter 143 as the port number.
Enter the host name as imap.secureserver.net if your using IMAP. If your using POP3, use pop.secureserver.net.
Then Click on “Start Backing Up”
If all the settings are correct, your email accout will be added and be scheduled for backup. If you still have issues backing up your data, you can contact us at support@ThinkDataBackup.com
Login to your ThinkDataBackup.com account by visiting https://www.ThinkDataBackup.com/
From the dashboard, click on ![]() .
.
Enter your email address in the form <username>@<domain>.com and your password.
Click on the ![]() button.
button.
To get your advanced options, visit the Email Control Panel of your Yahoo Account and click on 'Additional Options'. You would find your email settings as shown below.

Select POP3 as your Protocol settings.
Then select the securityas SSL.
Enter the port number as 995.
Enter the host name as pop.bizmail.yahoo.com.
Then Click on “Start Backing Up”
If all the settings are correct, your email accout will be added and be scheduled for backup. If you still have issues backing up your data, you can contact us at support@ThinkDataBackup.com
Login to your ThinkDataBackup.com account by visiting https://www.ThinkDataBackup.com/
From the dashboard, click on ![]() .
.
Enter your email address in the form <username>@<domain>.com and your password.
Click on the ![]() button.
button.
Select IMAP as your Protocol settings.
Then select the securityas SSL.
Enter the port number as 993.
Enter the host name as secure.emailsrvr.com.
Then Click on “Start Backing Up”
If all the settings are correct, your email accout will be added and be scheduled for backup. If you still have issues backing up your data, you can contact us at support@ThinkDataBackup.com
In order to back up an email account with 2-step-verification enabled, you will need to generate an app password for your email account.
Instead of your correct email password, please input that app password as your email's password on ThinkDataBackup.com dashboard.
We can back up your emails without disabling 2-step-verification.
How to generate App Password
Google:https://support.google.com/accounts/answer/185833?hl=en
Hotmail:http://windows.microsoft.com/en-us/windows/app-passwords-two-step-verification
Yahoo:https://help.yahoo.com/kb/yahoo-account/generate-separate-quotapp-passwordquot-sln15241.html
You can search through your attachments using keywords that are present in the name of the attachment.
Go to the Attachments page.
Click on the search box and type in the keyword.
![]()
For example, if you want to search for a file named franceholiday.jpg, you can search for keywords like “france” “franceholiday” or “franceholiday.jpg”
You can also search for a file by its extension such as “.jpg” and “.pdf” .
You can either view your attachments from the Email View or the Attachment view page. ThinkDataBackup.com lists all your email attachments under a single folder and makes it easier for you to browse through them.
Email View :
Click on ![]() beside the email account where the attachment resides.
beside the email account where the attachment resides.
Browse through the emails or search for the email containing the attachment.
Scroll down the email and you can find the attachment at the bottom.
Click on it and it will be downloaded to your computer to the default download location of your browser.
Attachment View :
Go to the Attachments page.
Search for the attachment using the search bar or browse through the list of attachments.
You can either download the attachment or share it with your friends using Email, Facebook, Twitter, LinkedIn or via a share link.
ThinkDataBackup.com provides you multiple ways to share the attachment with your friends. You can either share it using Facebook, Twitter, LinkedIn, email or by sending them a sharing link.
Share Link ![]()
Hover your mouse over the attachment that you would like to share. You will see the Share Link.
Click on the Share Link.
A new window will open with a preview of the attachment.
You can copy the url of the link from the address bar and send it to your friend.
Your friend can either view the attachment or download it by clicking on the ![]() button.
button.
Facebook ![]()
Hover your mouse over the attachment that you would like to share. You will see the Facebook Button.
Click on the Facebook Button.
A new pop up window will show up with the link to your file.
You can add your custom message to the link.
Click on “Share” and the link to the file will be posted on your Facebook wall.
Your friends can now click on the link to view the attachment.
Twitter ![]()
Hover your mouse over the attachment that you would like to share. You will see the Twitter Button.
Click on the Twitter Button.
A new pop up window will show up with the link to your file.
You can add your custom message to the link.
Click on “Tweet” and the link to the file will be posted on your Twitter feed.
Your friends can now click on the link to view the attachment.
LinkedIn ![]()
Hover your mouse over the attachment that you would like to share. You will see the LinkedIn Button.
Click on the LinkedIn Button.
A new pop up window will show up with the link to your file.
You can add your custom message to the link.
Click on “Share” and the link to the file will be posted on your LinkedIn wall.
Your friends can now click on the link to view the attachment.
Email ![]()
Hover your mouse over the attachment that you would like to share. You will see the Email Button.
Click on the Email Button.
A new pop up window will show up where you can enter the email address/es of the friends with whom you want to share the attachment with. You can add your custom message to the link.
Click on “Send” and the link to the file will be emailed
Your friends can now click on the link to view the attachment.
Once you share the attachment, only people with the link can view the attachment. Every attachment has a unique link. If you want to, you can Unshare the attachment anytime by clicking on the ![]() icon beside the file.
icon beside the file.
No. When you share an attachment with someone, the person can only view that particular attachment. He/she will not have access to any of your emails or other attachments. We have taken multiple security measures to ensure that only the attachments you choose to share are viewable by those you share with.
Just like your emails, your attachments are safe. No one has access to your attachments unless you have explicitly shared it with someone.
When you share an attachment with someone, only that person with the link has access to that attachment. The person can only view the attachments shared with him and will not be able to access the rest of the attachments.
Yes. We allow you to share an attachment with anyone who has the link. Hover your mouse over the attachment that you would like to share. You will see the Share Link.
Click on the ![]() Link.
Link.
A new window will open with a preview of the attachment.
You can copy the url of the link from the address bar and send it to your friend.
Your friend can either view the attachment or download it by clicking on the ![]() button.
button.
We have created a separate folder that lists the shared attachments.
Go to the Attachments page by clicking on the Attachment Manager button on the Dashboard beside the email account that you want to view.
Click on the “My Shared” folder on the left column of the screen.
You will see the list of all the attachments that you have shared.
You can also go to the main Attachments folder. If an attachment is shared, it will have an ![]() icon beside it.
icon beside it.
No. We do not limit the number of attachments that you can share. We do not restrict the number of people with which you can share the attachment. You can share as many attachments that you have with any number of people.
No. We do not restrict the size of the attachment. Your email provider restricts the size of your attachment. ThinkDataBackup.com supports attachments of all sizes and types.
We do not allow users to delete attachments, Emails are meant to be immutable, and to retain the sanctity of your backups, we do not allow for backed up emails to be altered in any way. This includes modifying the messages and/or attachments. You can share the attachments with your friends but you cannot modify it.
Login to your ThinkDataBackup.com account and go to your Dashboard.
Click on the ![]() button beside the email account that you want to migrate.
button beside the email account that you want to migrate.
Enter the email address and password of the new account to which you want to migrate the emails.
If you are using a personal email server, then you can refer to the Advanced Settings page for more details.
Your email will then be scheduled for migration.
Yes. You can migrate an email backup to an existing account. The emails will be added to the new account preserving the folder structure.
You can follow the instructions here to migrate your email.
Yes. You can migrate multiple email backups to a single email account. All the emails will be migrated to the new account by preserving your folder structure.
You can follow the instructions given here to migrate each email backup to the email account.
Yes. The original date and time of the emails will be preserved in the target account.
Login to your ThinkDataBackup.com account by going to https://www.ThinkDataBackup.com/
You will be redirected to your Dashboard.
Click on the ![]() button beside the email account that you would like to restore.
button beside the email account that you would like to restore.
You would be asked to reconfirm your action. Click Yes.
Your emails will now be restored to the email account.
The emails will be restored into the original folders if the protocol of your email account is IMAP.
For an email account with POP protocol, the emails will only be restored in INBOX.
As for migration, when the protocol of the original and destination email addresses is IMAP, the migrated emails will be sorted out into sub-folders.
Please note that all of the emails will be migrated into IBOX when running the migration from IMAP email address to POP email address.
If you want to restore your emails, you can follow the instructions given here.
No. We currently do not provide this feature. We are working towards implementing more features in the coming months.
Once you have backed up your Gmail account, you can migrate all the emails to Fast Mail. Just click on the migrate button and enter your email address and password for yoru fastmail account. Then click on the Advanced button and use the following settings :
Hostname : mail.messagingengine.com
Port : 993
Protocol : IMAP
SSL : True
Then click on Migrate and your emails will then be migrated.
The most common errors we see are connection and authentication errors.
Our servers have to establish a connection to the mail servers to retrieve the emails. There are a few factors which can disrupt it:
- The mail server is under heavy load and does not respond to our connection requests.
- The packets get dropped or blocked(for e.g. throttling of traffic)
- The server could be down.
- The configuration for the server changed.
- The SSL cert for the server expired or is self signed(which causes authentication to fail)
- Your password has changed or is incorrect. That causes authentication errors.
Our servers will attempt to reconnect. But as you can see many of the factors are beyond our control, you can try to address the factors by trying again later, check the server configuration and/or SSL cert and confirm your password entered.
We support two key parameters for which the administrator can create a report. The two parameters are :
- No. of Emails (Send and received)
- Total Storage used.
The administrator can general reports for either one or a mix of both the parameters. The reports can be generated for a particular email account or for all the accounts as a whole over a custom day range.
Go to https://www.ThinkDataBackup.com and login to your account.
Click on the "Reporting" menu button on the screen.
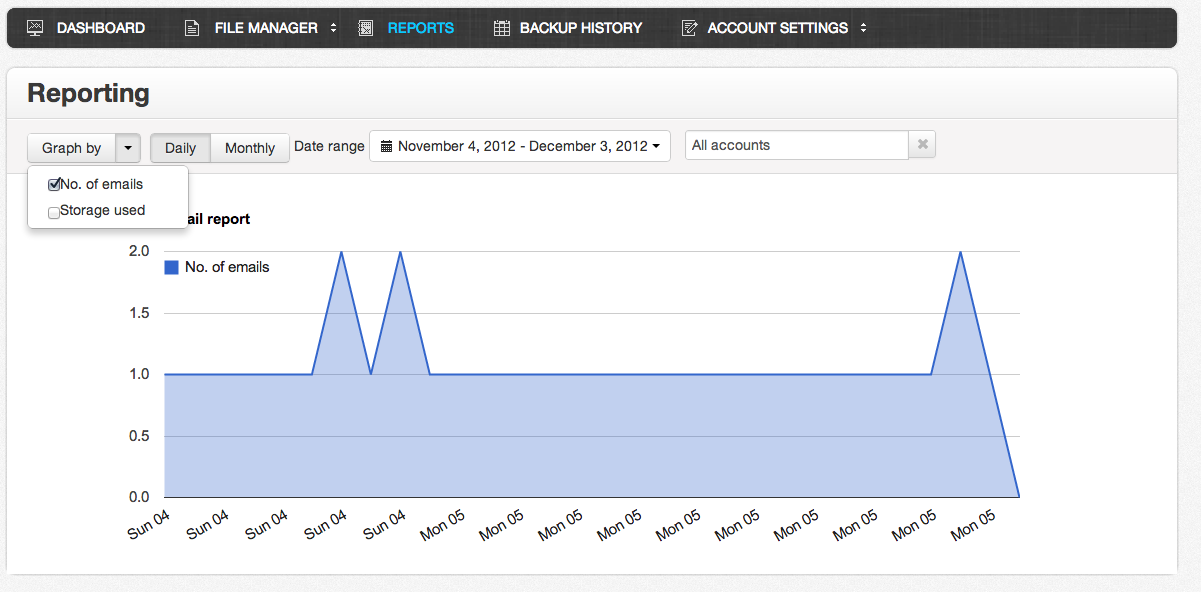
Under the "Graph by" section, select the parameter for which you would like to generate the report. You can choose between :
- No. of emails.
- Storage used.
Click on the "Daily" button if you want the report on a daily basis. You can also choose to do this on a "Monthly" basis.
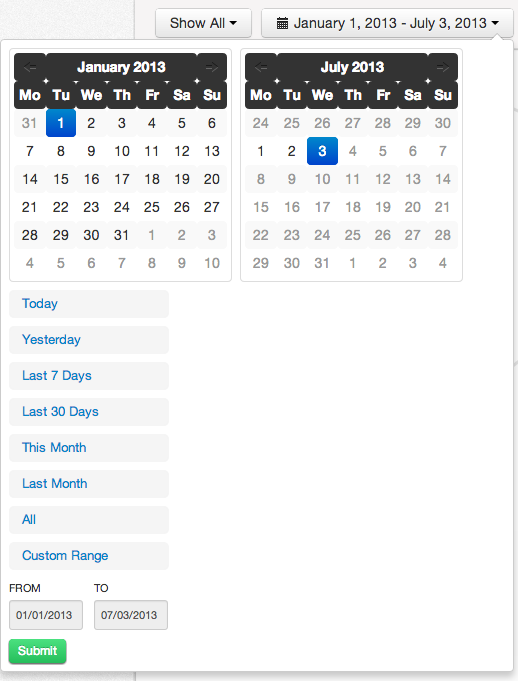
Click on the Date Range section for the drop down list to appear. You can select from the following options :
- Today
- Yesterday
- Last 7 days
- Last 30 days
- This month
- Last month
- Custom date range
You can choose any of the following as per your need. As you select the date choice, your report will be shown to you on the screen.
Please note that the "All acocunts" will be set by default for you.
Go to https://www.ThinkDataBackup.com and login to your account.
Click on the "Reporting" menu button on the screen.

Under the "Graph by" section, select the parameter for which you would like to generate the report. You can choose between :
- No. of emails.
- Storage used.
Click on the "Daily" button if you want the report on a daily basis. You can also choose to do this on a "Monthly" basis.
Click on the Date Range section for the drop down list to appear. You can select from the following options :
- Today
- Yesterday
- Last 7 days
- Last 30 days
- This month
- Last month
- Custom date range
You can choose any of the following as per your need.
Click on the text "All Accounts" and select the email account for which you would like to generate the report. You can also type in the email address to narrow down the options shown in the drop down list. As you select the email address, your report will be shown to you on the screen.
Download would be made available in XML, PDF, CSV and TXT format.
At the moment, we do not support a this feature. You can only view a report of the total number of emails sent and received. In the coming months, we will be adding more detailed reporting and filtering options.
Most of the well known hosted exchange providers such as GoDaddy, Office 365 and Rackspace support IMAP together with hosted exchange. So you can use IMAP protocol to backup the emails on ThinkDataBackup.com We current do not have a method of using Exchange to backup emails. You can find settings for some of the known hosted exchange providers under our FAQ sectiono of Hosted Exchange.
Yes. GoDaddy's hosted exchange support IMAP as well to allow access to emails for their hosted exchange account. Thus you can use IMAP protocol to backup your emails. Please use the following settings under Advanced settings to backup your emails.
Protocol : IMAP
Host Name : mail.ex4.secureserver.net
Port : 993
Encryption method : SSL
Yes. Office 365's hosted exchange allows IMAP protocol to backup your emails. Please use the following settings under Advanced settings to backup your emails.
Protocol : IMAP
Host Name : outlook.office365.com
Port : 993
Encryption method : SSL
Yes. Rackspace hosted exchange support IMAP protocol to backup your emails. You can use IMAP to allow ThinkDataBackup.com to pull emails from the secure. Please use the following settings under Advanced settings to backup your emails.
Protocol : IMAP
Host Name : secure.emailsrvr.com
Port : 993
Encryption method : SSL
Your files are stored securely on our servers. We use military grade encryption to ensure your data is well protected and stored on our server.
We pay special attention to security for our application and our servers. We have an experienced team which uses the best engineering practice and tools to develop the product.
Your emails can only be accessed by your account. ThinkDataBackup.com employees are prohibited from viewing your account and email backups. We follow the same methods like most online services where we have a small team of employees who must be able to access user data for the reasons stated in our privacy policy (e.g., when legally required to do so). We have a strict policy and access controls for these employees that prohibit them to access the data except for these rare situations.
We use AES 256 bit encryption and Secure Sockets Layer (SSL). Our files are stored on Amazon’s Simple Storage Service (S3). Amazon S3 itself has its own robust security policy of its own, details of which can be found here.
ThinkDataBackup.com uses Amazon’s Simple Storage Service (S3) to store all your emails. Amazon S3 is a secure data storage solution provided by Amazon AWS. It uses all the latest security methods to ensure that the files are stored securely. You can find more about the security implementation of S3 here.
All the files are encrypted and stored on the servers. We follow strict regulation and access control policies to access the S3 storage. Your files are secure and are only visible to you via your ThinkDataBackup.com account.
We ensure that your emails are stored securely on our servers. Your email backup can only be access by you via your ThinkDataBackup.com account. No other user with a ThinkDataBackup.com account has access to your files. We have proper security policies in place to ensure that your files are protected from unauthorized access.
ThinkDataBackup.com uses AES-256 bit encryption to encrypt your emails. We use Secure Socket Layer (SSL) to pull information from your current email provider to our servers.
Your emails are stored on Amazon’s Simple Secure Storage (S3) solution which has a robust security policy, details of which can be found here.
Login to your ThinkDataBackup.com account.
Click on "Account Settings" on the Menu Bar.
Scroll down to the Password Secton as shown below.
Type in your current password under “Current Password”. Then type in your new password and confirm it. Click on Save and your password will be changed. You can now use your new password to login to your account.
When you sign up for the trial account, you are provided 100 seats with unlimited storage space. After your trial period is over, you can choose a full plan based on the numbr of seats that you require. We charge per one email account (1 user). Storage is unlimited. To Upgrade to a full account,
Sign in to your ThinkDataBackup.com profile by going to https://www.ThinkDataBackup.com
Click on the”Upgrade Now” button on the dashboard.
Click on the Choose Plan button beside the plan which you would want to sign up for.
You will then be directed to the payment page. You can use PayPal or your credit card to make the payment and your account will be upgraded immediately.
You can make a payment using your Credit Card or Debit Card for ThinkDataBackup.com Pro Account. We also provide you the option to use PayPal as a mode of payment for your account. We current support two payment gateways namely PayPal and WorldPay.
We use a secure payment gateway and we do not store your credit card details while accepting your payment. Please read our Privacy Policy for more details on the data that we collect.
If you do not have a credit card, you can use your Debit Card to make the payment. We support two payment gateways to process your payments. You can either use PayPal or WorldPay to make the payment.
You can look at the list of countries from which PayPal accepts payment by visiting the link here. For the rest of the countries, you can use WorldPay.
Your existing plans remains in place. When your existing plan runs out, you will be switched over to the new plan with the equivalent number of seats.
It is better that we explain with an example.
For eg, you paid $36 for 1 seat that starts on Jan 1 2014 to Jan 1 2015. On Feb 1, you decide that you want to upgrade to 2 users. We will issue you a new invoice for 2 users that starts from Feb 1 2014 to Feb 1 2014. How much do you have to pay?
2 users cost $72 a year. But you've already paid $36. Since you are 1 month into your subscription, we take it that you have used $3(1 user/month costs $3) and you have $33 remaining. The new invoice would thus cost $42(72 - 33).
Please reach us at support@ThinkDataBackup.com com should you have any questions.
It is better that we explain with an example.
For eg, you paid $72 for 2 users that starts on Jan 1 2014 to Jan 1 2015. On Feb 1, you decide that you want to downgrade to 1 users. We will issue you a new invoice for 1 user that starts from Feb 1 2014 to Feb 1 2014. How much do you have to pay?
1 user only cost $36 a year. But you've already paid $72. Since you are 1 month into your subscription, we take it that you have used $6(2 users/month costs $6) and you have $66 remaining. The new invoice would cost $36. You would not have to pay anything. You would still have $30 with us(66 - 36). On the following year(which is Feb 1 2015), we will use the remaining money($30) for the new subscription.
Please reach us at support@ThinkDataBackup.com com should you have any questions.
Email Insights will allow administrators to anaylze all employees’ email usage. It also allows for managers to track all official communications going in and out of the company to ensure complete transparency. With the help of Email Insights, managers can track the following :
- Graphically view the email activity within the company
- Identify all employees’ contacts (i.e. preventing losing sales leads during a server crash or personnel resignation)
- Point out corporate communications to personal emails (i.e. spotting misuse of time for personal purposes or data leakage)
- Assess email effectiveness (i.e. amount of email sent / received versus performance)
- Filter through the communications to find specific conversations
Below is a video to describe Email Insights in detail :
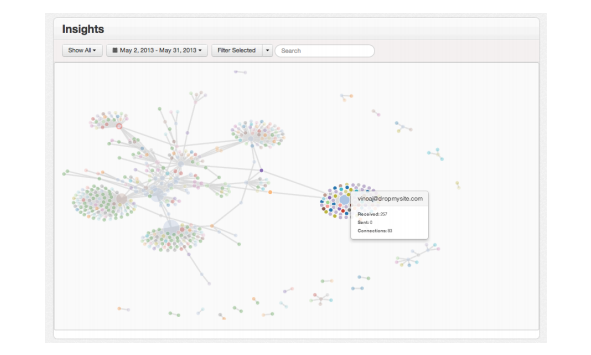
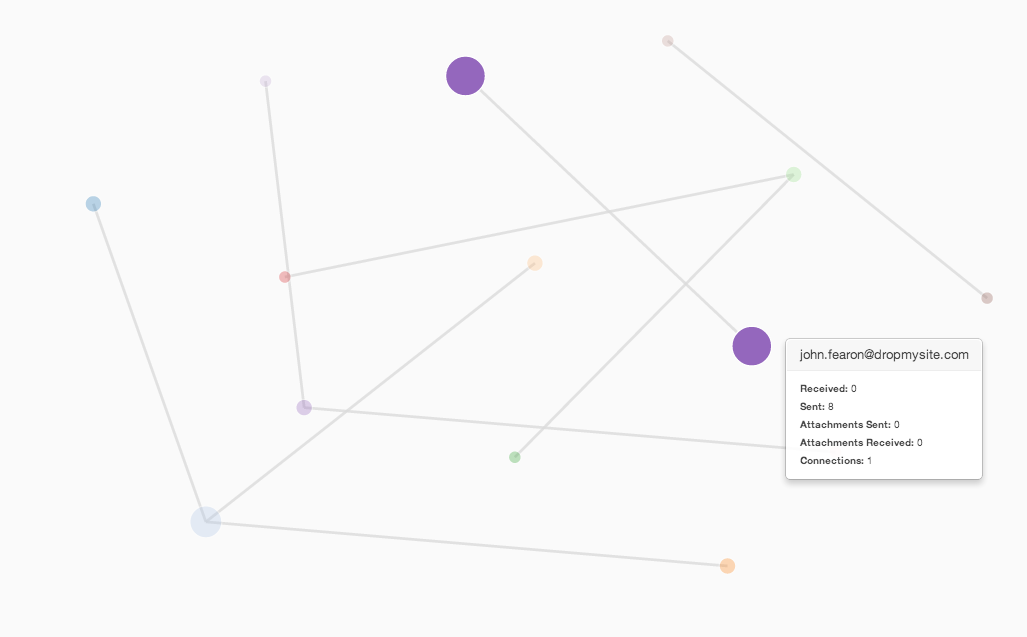
Each circle in the graph represents an email address to which an email has been sent or to which an email has been received. The email address represented by a particular address can be known by hovering over the circle. Some of the other details shown are :
- Received - Number of emails received by that particular email address.
- Sent - The number of emails sent from that email address.
- Attachments Sent - The number of emails with attachments sent by that email address.
- Attachments Received - The number of emails with attachments received by that email address.
- Connections - The number of email addresses to which an email has been sent or received by that particular email address.
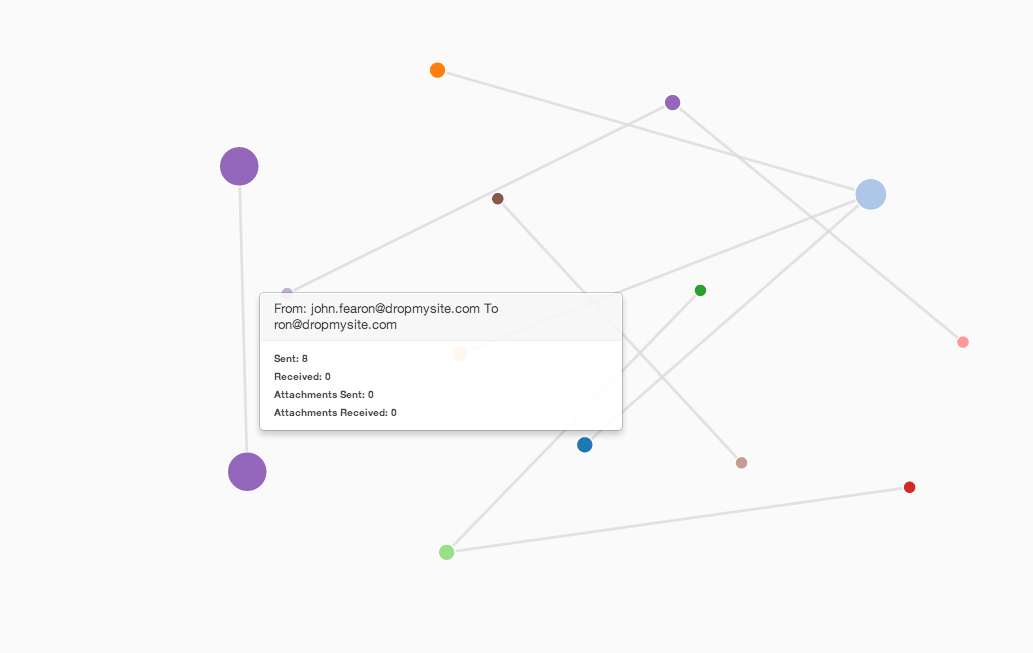
Each line between two circles represent an email interaction between the two email addresses (represented by the circle). The details of the email interaction can be seen by hovering over the line. The details are represented in the form of the emails from one person to the other. This is shown in the top grey box upon hovering the mouse on the line. The following details are shown :
- Sent : The emails sent from one email address to the other.
- Received : The number of emails received by the user (represented as From:) from the other user (represented as to:)
- Attachments Sent : The number of emails with attachments sent from one email address to the other.
- Attachments Received : The number of emails with attachments received by the user (represented as From:) from the other user (represented as to:)
Each color of the circle represents a domain of the email address such as @gmail.com or @dropmysite.com. This makes it easier to identify the email interactions sent to a particular domain. It also helps to detect fraud such as email forwarding to personal email accounts such as Gmail or Yahoo or Hotmail.
Yes. We allow you to either set a custom date range or select from the pre-set range such as Last month, Last 30 days and Last 7 days. You can do so by clicking on the Date button on top of the Insights pane.
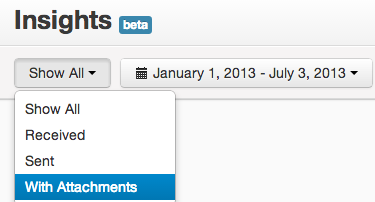
Yes. You can do so by using the Filtering tool provided. Click on the Show All button on the top right of the Insights pane and then click on "With Attachments" and your data will be filtered and shown. You can also choose from other options including :
- Received - Shows all the email interactions of the emails received by the email addresses backed up under your account.
- Sent - Shows all the email interactions of the emails sent by the email addresses backed up under your account.
- Show All - Shows all the email interactions of the email addresses backed up under your account.
Email Insights allows you to select certain circles (email addresses) and then view the graph showing only the circles selected. This can be done by first selecting the circles which you want to view. Once you click on a circle, the circle gets a red border. This way, you can select multiple circles. Once you have selected all the email addresses you want to view, you would notice that the "Filter Selected" button is no longer greyed out. Click on the "Filter Selected" button and only the selected circles will be shown and the rest will be hidden.
If you want to remove a particular email address from the list of selected email addresses, just click on the dropdown button beside "Filter Selected" and click on the cross beside the email address which you would like to remove.
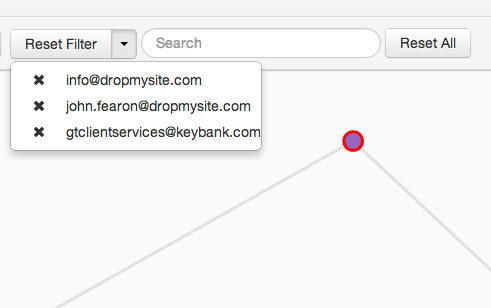
If you would like to unselect all the circles and go back to the default view then click on the Reset Filter button.
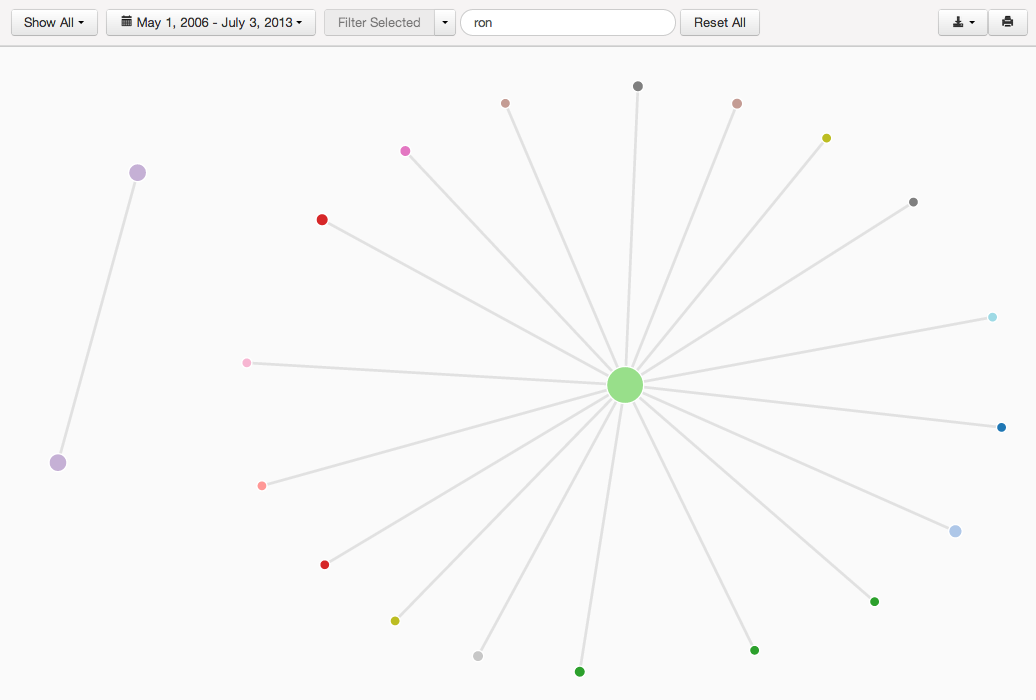
Yes. The search feature of Email Insights allows you to enter a keyword that is present in the email address which you are searching to filter and visualize that data. You can search for the following :
- An Email Address - Just type the email address such as support@dropmysite.com and press Enter and the graphs will be updated.
- A Domain - Just type @domain.com (Ex.. @gmail.com) and all the emails to and from that domain will be shown.
- A Word or employee name - Just type the employee name such as "Ron" and you will see the interactions of all the email addresses which have the word "ron" in them.
Yes. You can double click on any part of the screen to zoom in to. You can also double click on a circle to zoom into the interactions of that circle.
To zoom out, just double click on any part of the screen and the pane will zoom out.
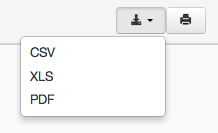
You can download the email interaction data by clicking on the download button on the top right hand side of the pane. Once you click on the button, you will be asked to select the format in which you want to download the data. We currently support CSV, XLS and a PDF. The data is divided into 5 columns which are :
- Email Address : The email address for which the data is been shown.
- Sent : The number of emails sent by that email address.
- Received : The number of emails receive by that email address.
- Sent Attachments : The number of attachments sent by that email address.
- Received Attachments : The number of attachments received by that email address.
You can also take a print out of the screen in a print friendly format by clicking on the Print button.
If you have any questions about on how to use ThinkDataBackup.com you can search for it in our FAQ section. If you do not find a solution, you can email it to us from the Contact Us page.
If you have any questions about on how to use ThinkDataBackup.com or a technical related query, you can search for it in our FAQ section. If you do not find a solution, you can get support here
Email Archiving means to preserve and making searchable all emails coming in and out of an organization. In addition to simply accumulating email messages, these applications index and provide quick, searchable access to archived messages independent of the users of the system using a couple of different technical methods of implementation. The reasons a company may opt to implement an email archiving solution include protection of mission critical data, to meet retention and supervision requirements of applicable regulations, and for e-discovery purposes.
Please visit the “Why Archive” tab. The navigation link is Business->Why Archive or click here https://www.ThinkDataBackup.com /business/why_archive
Email Archiving is a must for businesses:
- With substantial email communication
- With email communication across geographies
- With email communication between the organization and the outside word
- Suffering from high training costs due to high attrition and worrying of loosing you key clients to it
- With critical information being sent over emails
- Large server storage costs and wishes to cut on them
- Worrying about business continuity and disaster recovery
- Worrying about communication gaps and failures
- Worrying about Employees code of conduct
You need to enter the email address using the .csv files. Please download the .csv template file by clicking here.
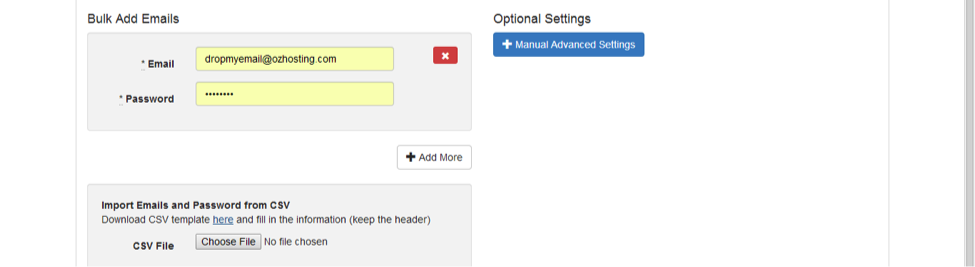
Please keep the header and add emails and the passwords below the header. Do not change the name of the file. Once finished save the file and upload it.
You need to enter the email address using the .csv files. Please download the .csv template file by clicking here.
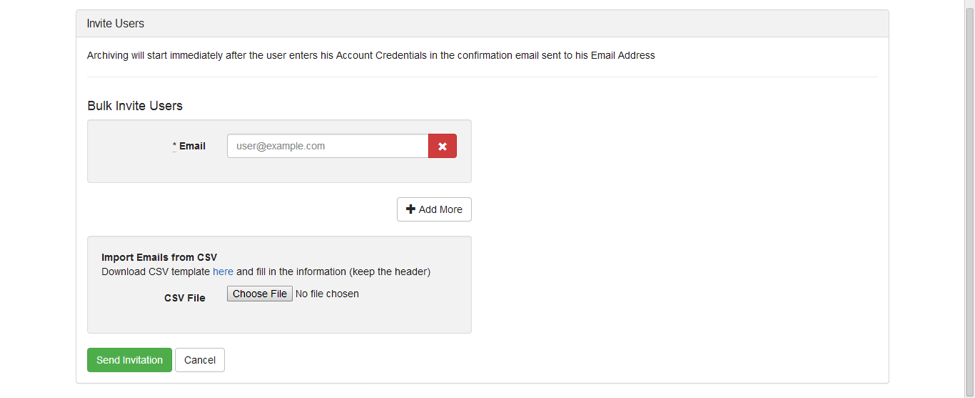
Please keep the header and add emails below the header. Do not change the name of the file. Once finished save the file and upload it.
Less than 1 second.
DME Archiver can handle any types of attachment. All attachments are separately stored and can be accessed without having to open the email messages. It is also possible to search only the attachments and share the attachments or files on the social network.
All users are able to retrieve archived messages from their own accounts. Only the Admin can access other employees email accounts and restore them.
DME Archiver stores all your emails indefinitely with unlimited storage. This means all your messages are stored. Aint that awesome?

a. Restore all emails: With just a click of a button you can restore all your emails in your email account. Just click Restore All.
b. Selective restore: By opting for elective restore you can restore emails based on a date range. Select a date range as shown below:
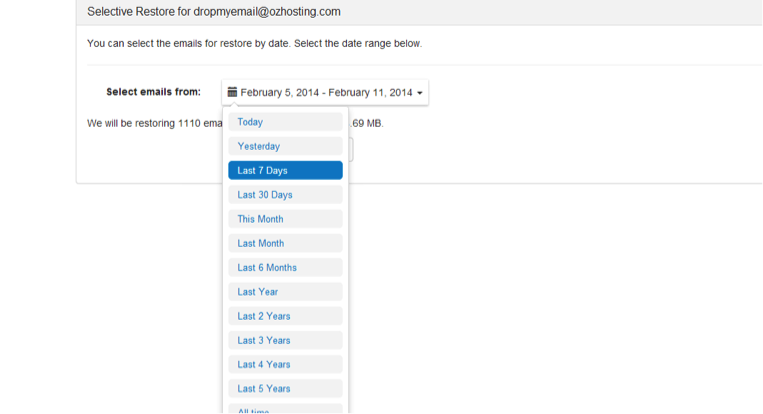
Once selected you can see the number and size of emails that will be restored. Just click on Start Restore and the restore process begins.

Unfortunately, in the nature of the data backup, the functionality of deleting unwanted backup emails is not avaialble.
It’s using encryption. We use AES 256 bit encryption and Secure Sockets Layer (SSL). Our files are stored on Amazon’s Simple Storage Service (S3). Amazon S3 itself has its own robust security policy of its own, details of which can be found here.
Yes, you can download and then migrate by .pst file. Also you can use the advanced Migrate option to migrate all the data from one email account to another.
Yes. Since our files are stored on Amazon’s Simple Storage Service (S3), which itself has its own robust security policy of its own, details of which can be found here. http://aws.amazon.com/
Yes, sometimes we have maintenance downtime, but it will not affect the archive part.
No. You can download .pst by mailbox, and every mailbox has different .pst. Therefore, the folder structures will not be downloaded.
All your emails from all your folders (except draft) will be archived. However, the exact folder structure will not be the same. On the archived mailbox you will only be able to see 2 folders namely Inbox and Sent Items. All your sent emails will be archived in Archive Sent items and the remaining ones in your inbox.
All your emails from all your folders (except draft) will be archived. However, the exact folder structure will not be the same. On the archived mailbox you will only be able to see 2 folders namely Inbox and Sent Items. All your sent emails will be archived in Archive Sent items and the remaining ones in your inbox.
Only the emails which have been deleted from your mail box will be restored. In case you do not see an email restored please check ensure you search it thoroughly in your mailbox.
Since we use cloud technology to archive our emails, all users can access the archived accounts using any device with an internet connection. Moreover, our smart phone application will be launched very soon.
Currently DME Archiver only supports Microsoft Exchange server, Office 365 and google Apps. Soon other servers will be added.
Microsoft Exchange Server journaling lets you record a copy of, or journal, all email communications in your organization and send them to a dedicated mailbox on an Exchange Server. Journaling is simply a means of recording your users’ messages. Once you enable journaling on Exchange Server, you can then configure your server to forward journaled messages to Message Archiving
- Microsoft Exchange Server 2000 Standard or Enterprise Edition
- Microsoft Exchange Server 20003 Standard or Enterprise Edition
- Microsoft Small Business Server with Exchange Server 2000 or 2003 Standard Edition
- If you are using Exchange Server Standard Edition, you must have at least two of these servers on your network. You must reserve one of your servers for receiving journaled messages only. This reserved server cannot contain any user mailboxes.
- You must turn on journaling for individual mailbox stores on Exchange Server. You cannot turn on journaling for your entire organization at once.
- You cannot send journaled messages to your archive using a mail-enabled public folder (folder with an email address) on your Exchange Server. You must set up a journal recipient mailbox according to the instructions in this guide.
MS EXchange 2013
Prerequisites:
Journaling Mailbox for you Microsoft Exchange Server
Setup Process
- Login to your Miscrosoft Exchange as Admin
- Go to Exchange admin center, which usually is YOUR_MS_EXCHANGE_URL/ecp
- Navigate to Compliance Management > Journal Rules
- Click on the "+" icon to add new Journal Rule
- Enter the following information:
- Send journal reports to: [Journaling Mailbox]
- If the message is sent to or received from: [Apply to all messages]
- Journal the following messages: All Messages
- Click Save
Host Settings for the Journal Mailbox depends on the Email Provider used, please contact us if you need assistance.
Office 365 medium and enterprise
Prerequisites:
- Office 365 Medium or Enterprise Account installed with Administrator access.
- A support Email address (within the same organization) for undelivered Journal Report. Also known as the Alternate Journaling Mailbox. It receives journal reports only if any journal mailboxes specified in any journal rules are unavailable. Example:najournal@YOURorganization.com
- A separate Email account that is NOT from your organization. This would be used as the Journaling Mailbox to store all the journals collected from your organization. Example: collections@NOTYOURorganization.com
Setup Process
- Login to Office 365 as Admin
- Go to Exchange admin center https://outlook.office365.com/ecp/
- Navigate to Compliance Management > Journal Rules
- Click on "Send undeliverable journal reports to" and set to [Alternate Journaling Mailbox]. Example: najournal@YOURorganization.com
- Click Save
- Click on the "+" icon to add new Journal Rule
- Enter the following information:
- Send journal reports to: [Journaling Mailbox]. Example: collections@NOTYOURorganization.com
- If the message is sent to or received from: [Apply to all messages]
- Journal the following messages: All Messages
- Click Save
Host Settings for the Journal Mailbox depends on the Email Provider used, please contact us if you need assistance.
Google Apps BCC forwarding
Prerequisites
Journal Mailbox
- An external mailbox that is of different organization/domain to the one that you are trying to archive
- If Mailbox is under the same Google Apps Account, ensure it is under different organization with the organization to be archived
- If you don't have sub-organizations you need to use external mailbox for Journaling
Setup Sending Routing Settings
- Sign in to the Google Admin console
- Click Google Apps > Gmail > Advanced settings
- In the Organizations section (left hand side of page), highlight your domain or the organizational unit for which you want to configure BCC settings
- Scroll down to the Sending routing section and click configure
- Enter Configuration name
- On Email messages to affect, check Outbond and Internal - Sending options
- On For the above types of messages, do the following, check Also deliver to, Add more recipients
- Click Add
- Select Advanced from the dropdown
- Check Change Envelop Recipient, choose Replace Recipient and input the Journal mailbox address (non organization or different domain email)
- Check Do not deliver spam to this recipient if you dont want to capture spam emails
- Check Suppress bounces from this recipient
- Check Add custom headers, input DME-JOURNAL-REPORT : true, and click save
- Click save
- Click Edit Setting save button
- Click Save Changes
Setup Receiving Routing Setting
- Sign in to the Google Admin console
- Click Google Apps > Gmail > Advanced settings
- In the Organizations section (left hand side of page), highlight your domain or the organizational unit for which you want to configure BCC settings
- Scroll down to the Receiving routing section and click configure
- Enter Configuration name
- On Email messages to affect, check Inbound and Internal - Receiving options
- On For the above types of messages, do the following, check Also deliver to, Add more recipients
- Click Add
- Select Advanced from the dropdown
- Check Change Envelop Recipient, choose Replace Recipient and input the Journal mailbox address (non organization or different domain email)
- Check Do not deliver spam to this recipient if you dont want to capture spam emails
- Check Suppress bounces from this recipient
- Check Add custom headers, input DME-JOURNAL-REPORT : true, and click save
- Click save
- Click Edit Setting save button
- Click Save Changes
Without journaling messages are recorded every 2 hours and there is a possibility that some messages might be lost in those 2 hours.
Journaling is important for real time recording of mail messages. Journaling captures the message while in transit and records all incoming and outgoing communication. Without journaling messages are recorded every 2 hours and there is a possibility that some messages might be lost in those 2 hours. Hence it is always better to enable journaling.
The emails will only show up after our servers have pulled them from the mail servers. None of the emails are lost. All emails are kept on the mail server if they have enabled journaling.
Only the account admin can assign users to departments. Please login to your ThinkDataBackup.com archive account using the admin credentials.
Please click on your settings tab by clicking on your mail ID.

Click on Manage Email Accounts. Once you click on Manage Email Accounts you will see all the email IDs that you have archived.

You can see the departments frame on the left. Please add a department if you do not see that department in the Departments list. Click on the assign department for each mail id and select a department from the dropdown.
You can assign multiple departments to a user. Click on update to save the settings.


In order to assign access levels to users you have to assign them departments. Only the account admin can assign users to departments and give them access controls. Please login to your ThinkDataBackup.com archive account using the admin credentials.
Please click on your settings tab by clicking on your mail ID.
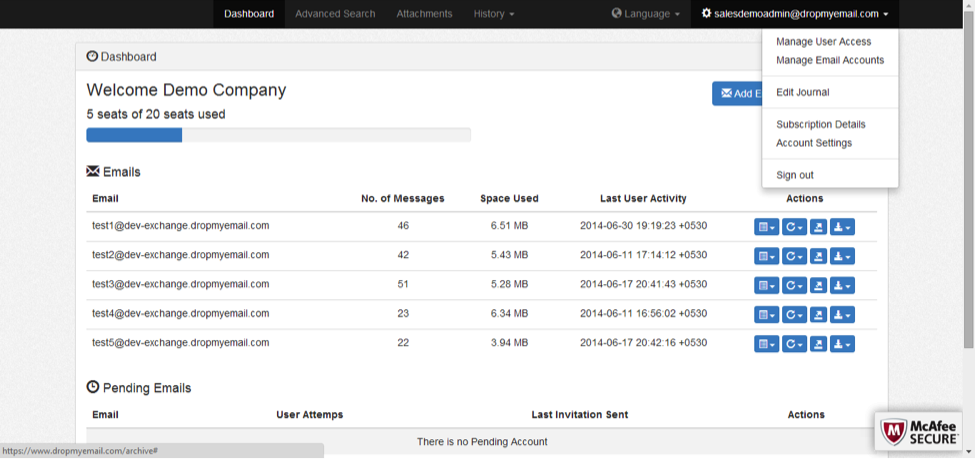
Click on Manage Email Accounts. Once you click on Manage Email Accounts you will see all the email IDs that you have archived.

You can see the departments frame on the left. Please add a department if you do not see that department in the Departments list. Click on the assign department and select a department from the dropdown.

You can assign multiple departments to a user. Click on update to save the settings.
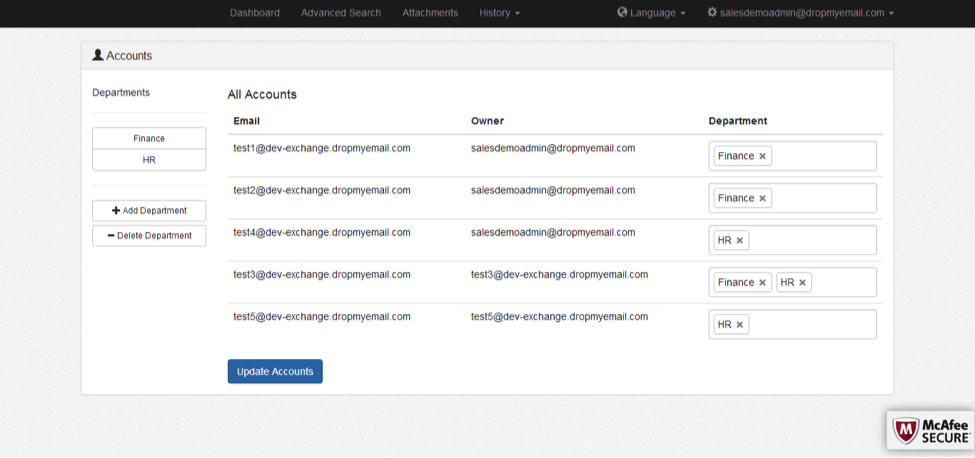
You will see the update success message once the settings are saved.
Please click on Manage User Access in the setting on top right.

You will see the following screen.

You can verify the departments for each user. Also, you can allow a user to access emails of other departments by manually entering a new department for the user.


For example in the above example user Test User5 belonged to HR department but we have granted him access to finance department emails also.
We allow 3 access levels:
1. Super Admin: The users in this category will have the option to
· view
· restore
· migrate
· download
· search
emails for all users in department(s) selected.
2. Admin Read Only: The users in this category will have the option to
· view
· download
· search
emails for all users in department(s) selected.
3. User: The users in this category will have the option to
· view
· download
· restore
· search
only their emails.
Please login to your ThinkDataBackup.com archive account. Click on the Advanced Search tab on top. You will see a page with 3 search Criteria.
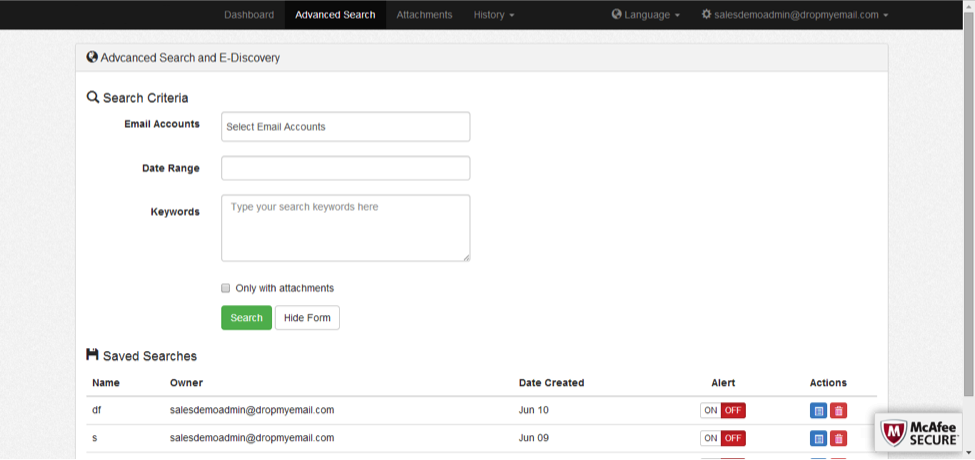
Please select the email ID where you want to conduct your search. If you are the admin you can select any one email id from the company here. If you are the admin of a department only your department employee email ids will appear here. If you are the user you will only see your email id here.
Please leave it blank if you want to search emails on the mailboxes for all users in the company or in your department.
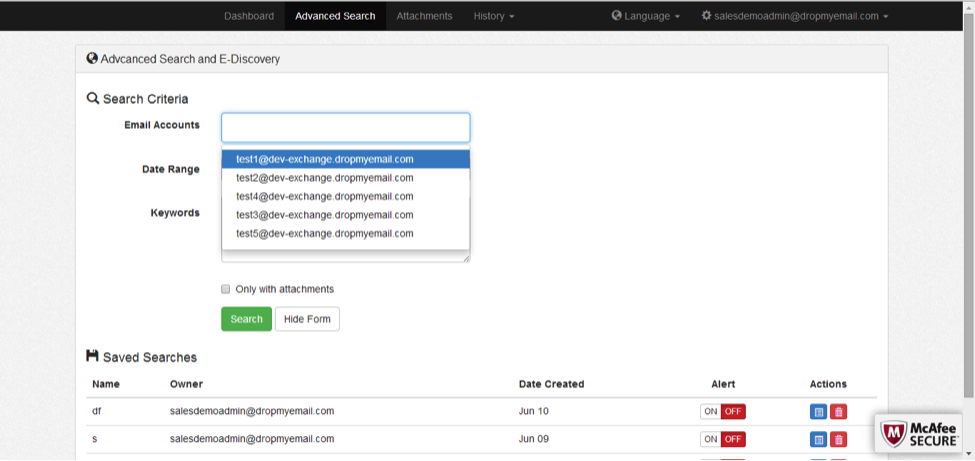
Once email account is selected, select the date range. Please leave it blank if you want to search for all dates.
Type keywords with which you want to search in emails.
Click on search. You will see the search results.
Please see the FAQ section which says "how to use an advanced search?."
Once you see the search results click on the “Save” button to save the search.
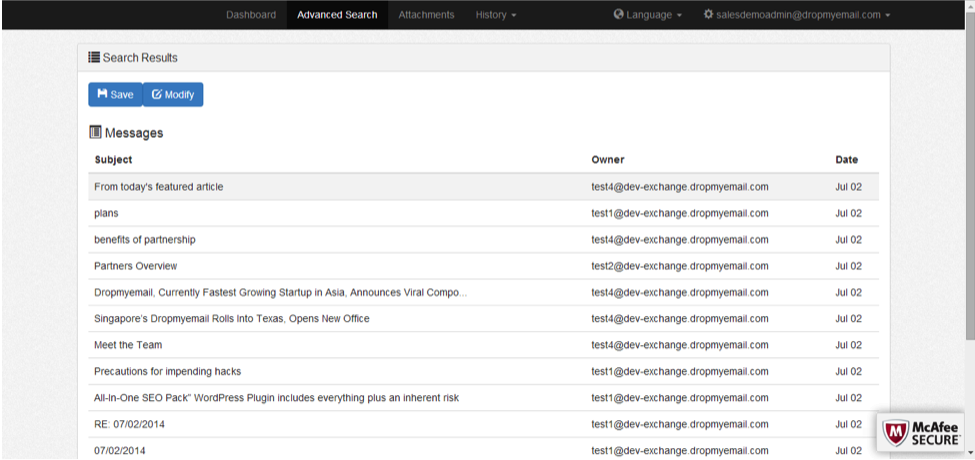
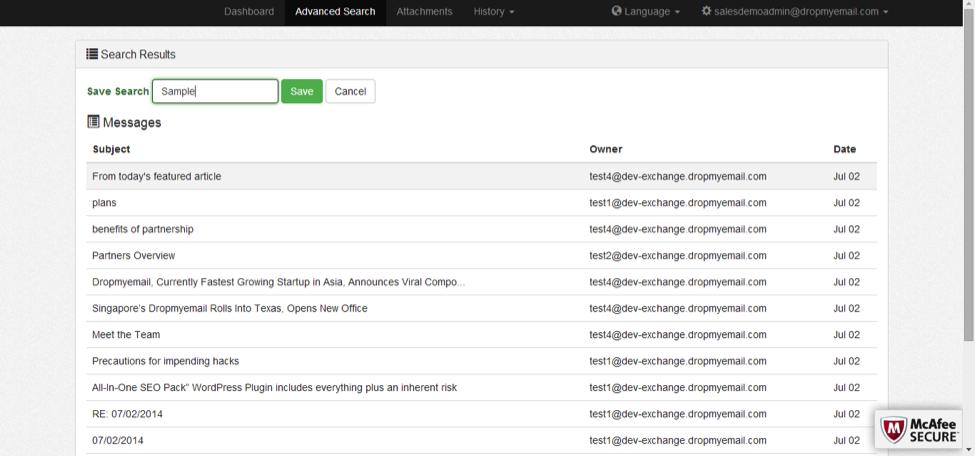
Please provide name to the search criteria and click on save. Once you save your search, click on Advanced Search tab on top to view your saved search criteria.
Please see the FAQ section which says how to do an advanced search.
Kindly save the search and give it a name.
Once the save is done you will see the option to download and restore the emails as part of the search. Please select all / or some of the emails to download / restore.
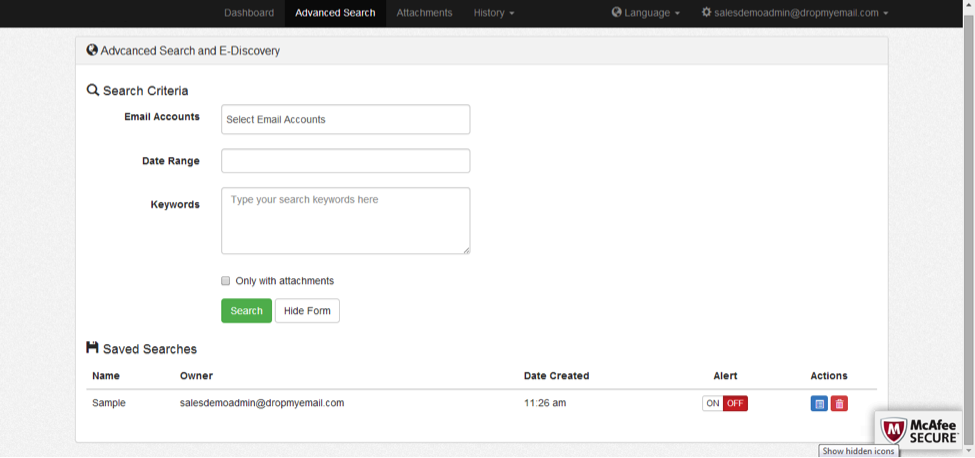
Please see the FAQ section which says how to do an advanced search.
Kindly save the search and give it a name.
Once you save your search, click on Advanced Search tab on top to view your saved search criteria.

Click on Alert “On” for the saved search.
